Showing posts with label Craftin'. Show all posts

Tuesday, September 21, 2010

A Fishin' We All Went!

A Fishing Birthday Party....


 for my baby....who is becoming a big boy too fast!

When I asked him what kind of party he wanted for his birthday this year he exclaimed a "Fishing Party momma!"  He loves to fish with his Daddy so I knew this would be a party that would really suit his interest and mean something for him.  It took a little planning, but it was all put together with very little effort,
and rather low cost and when all was said and done, I enjoyed putting it together!

So a Fishin' we all went!


I packed brown bag lunches for each child, with a sub, gold fish, and raisins.
Each child received a fishing hat, small tackle box, a cane fishing pole and candy "bait" for favors.


He has an old fashioned all boy theme in his big boy room so I plucked a few of his decorative items off the shelves and used them on our buffet table where the adults could assemble a sandwich for themselves.


An antique tackle box holds favor bags of "bait". 


A local park served as the beautiful backdrop for our party, so peaceful and serene.


Thats my Birthday Boy on the playground in his fishing vest.
It was great for keeping the children busy in between fishing and games like
"Pass the Bait Bucket"


The children each used a baited cane pole to fish for sunnies off the dock.


A few caught a fish....


While a few played with the worms.


I don't know who had more fun...the kids or the dads!


After washing up they sat down to eat their fishing lunches.....


And then we sang Happy Birthday and ate
Simple Homemade Chocolate Cupcakes, my sons favorite, with bass toppers my sweet SIL made for us.


and we sent them home with goodie bags of "BAIT"... make that kid bait!
Gummy worms, inside celophane sacks tied with a homemade bait fish tag that we wrote a short thank you note on the back of.


Well I hope this post finds you all well.  Things have changed here in our farmhouse and my family is still adjusting to school and their momma having a job there.  I love my new job, seriously, I do.  I am still trying to find a balance with juggling work and a family (my number one priority) which can be a challenging but we are managing just fine!
I will be working on some autumn signs and am almost finished with the fall decor so I'll be sharing in my next post.  Enjoy your week and Take Good Care of yourself!
XO
Dee

Thursday, July 15, 2010

Summertime Signs

A few Summertime Signs just listed in the Mercantile....

Well I've been busy painting again.  Yes, I'm totally covered in the seasonal shades of blues, purples and pinks, oh I'm such a messy painter lol.  Painting into the evening hours I love listening to the crickets, they keep me company while I create.  I am a night owl, that is when I do my best work!
Want a peek?
Sand Castles

Wiggle Your Toes in the Sand

Dreaming of Seashells By the Seashore

So, what do ya think?

I think I'm ready for the beach now....

I'll be back with a real post in a couple of days.

Thanks for peekin!


Take Care,
Dee

Wednesday, June 30, 2010

Americana Folk Art for Real Folks

A lil' Americana Folk Art for Real Folks...

Okay...I have to ask, is there anything more American than Folk Art?  Well of course there's apple pie...baseball and more but in regards to country design...well you get it, right?

I'm still working on decorating for the fourth, I still have lots to get ready for our annual Fourth of July party and will be busy for the next couple of days.  The Americana pretty much stays up here all summer long so it's worth the effort to go all out.  I love the festive colors and they go nicely with our Farmhouse decor.  

I have been oooohhhing and ahhhhing flag finial displays for a while now.  I almost bought one a few years back on a visit to Williamsburg but came to my senses when I reached for the price tag.  I saw another on one of our trips to Gettysburg again and was once more disappointed at the high cost of owning such a piece.  This time, each year, I would love to decorate with one but the prices are simply out of my budget.

Well, I finally decided enough was enough and this was finally the year that I was going to get me one.  So I impulsively hopped into the car and drove the 3+ hours to P.A., ran into the store I last saw it and to my pleasure picked up the very last one on the display counter.  Well I quickly shelled out the $150 to the nice man behind the counter before someone else could yank it right out of my hands, right?   

Ummm no....no I didn't!  I'm a terrible liar BTW.  Well, rather than do all that I decided I was just going to have to make it.  I grabbed my idea notebook, scribbled down a sketch of what I wanted and off I went to the stores to see what supplies I could gather.  I'm happy with the way it turned out and decided that I would share with my blogger friends in case anyone else felt a little last-minute ambition too. 

Here's a picture tutorial for those of you brave enough to tackle it, it is worth the effort.  It really was easy...does it look exactly like the $150 one?  No...but it's close enough and I like my less expensive, modified version even better.  Why you ask?  Well, because I made it....using good old fashioned American tenacity and ingenuity. 
Necessity is the mother of invention afterall....right?

Folkart Flag Display

Materials needed....
Most of it was found in the unfinished wood section at Michaels Craft store....

-6" block of wood.....$3.99
-3" block of wood......$2.99
-small 2" round MDF plaque.....$1.99
-6" square plaque.....$1.69
-round wood finial (p/u at home improvment store)..... $2.99
-White spray paint.....$1.29
-3- (12"x8") medium sized flags.......$3.75
-6- (6"x4") small flags.............$2.40

Optional decorations...Ribbon $2 roll, and plinth block picked up from home improvement store...$2.00, I chose one with a star
Tools needed.....hammer, drill, drill bits in varying sizes depending upon size of flag poles purchased.

~The Stacking and Glueing Part~


~The drilling part...remember your safety goggles!~


~(still drilling)~

4 holes ontop of block...4 more holes in center of each side...


If you are going to embellish it with a plinth block I recommend painting first and then glueing.  Spray paint the whole display....add decorative ribbon and flags.....


So, let's recap that is a total of apx. $20-$25, varies depending upon what you have readily available....Beats $100+(+) right?   mmmmhmmmm....  What do you think?  Will you give it a try?

Stay tuned to see how this purty display graces our
**Farmhouse Table for JULY 4th**


Now, how's about a Folk Art Flag to go along with that?

So were you able to follow that one?  Here's another folk art project that I have sold several of in the past.  The shipping is pretty expensive on these because of their size so I don't sell them in the online Mercantile but I'm going to share how you can make one of your very own instead. 


Material List....

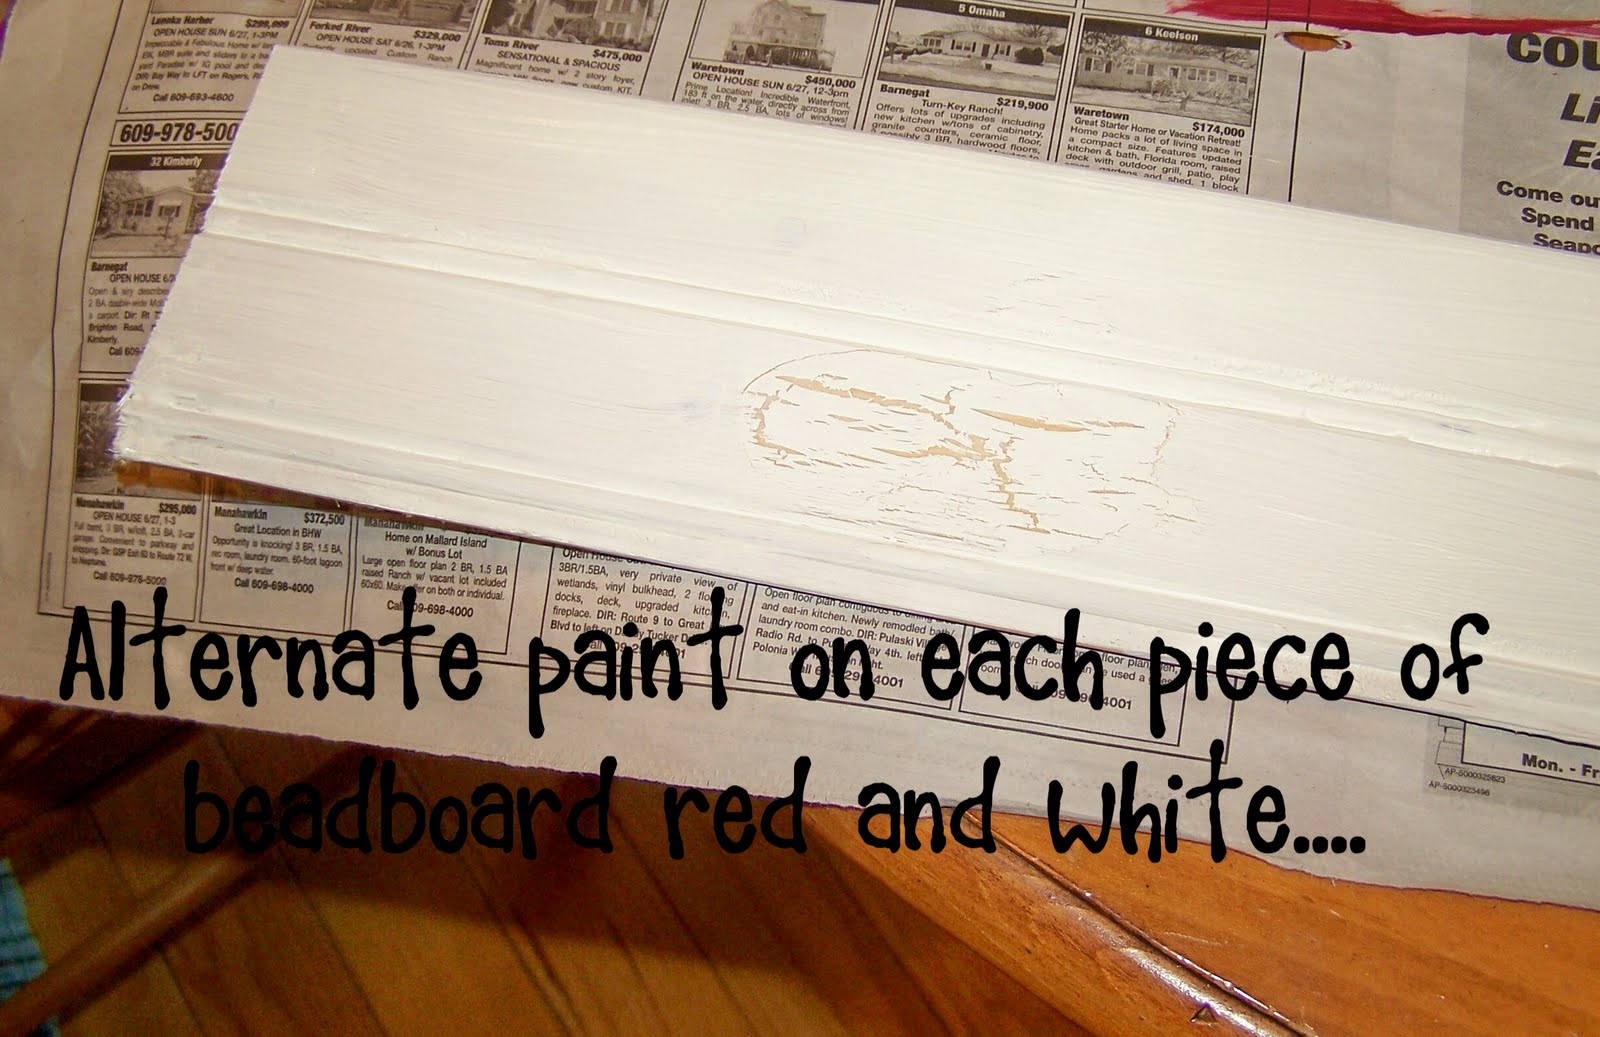
-(5) 32" long pieces of unfinished pine tongue & groove beadboard found here at Homedepot.
-(2) 16-18" pices of 1" wide x 1/2" thick pieces of pine for the back
-clear construction adhesive I use liquid nails

-1 iron star, I have purchased these at local country shops but you can substitute with wood/paint.
-Red, White and Blue craft paint, foam brushes
-white school glue
-teeny tiny finishing nails...from hardware store
-eye hooks or another form of hanger
-sandpaper
Tools needed:  Hammer, hair dryer


I paint the colors on pretty heavily so that it doesn't require multiple coats but if you have to paint multiple coats repeat glue process with each coat.  Let them dry throughly

 Make sure your edges are even and match up... 

Flip over to front side and.....


Make sure you are nailing in straight verticle line, into the back supports....I nail into each board.

 Peel tape off slowly when finished drying.


It took adhesive about an hour to dry thoroughly with the iron star.  If you use wood it won't take as long & paint is even quicker, but I like the look of the iron star....adds texture.


Add hangers to the top of the back supports and voila...you're finished.  I propped it up on my mantle in front of a large barn star to show you but it will be going outside on my porch tomorrow.  You can distress it with sandpaper as I did with mine if you like.  Take it a step further and antique it by wiping on a medium-dark colored stain and wiping off immediately.  The stain will settle into the cracks and make it appear older and worn.  I haven't done that with this one but still might, I kind of liked the cleaner look this time.  Seal with an appropriate sealer if using out doors.....Enjoy.....

I'm off to finish decorating will show you more hopefully on Friday! 

Let me know what you think of course and if you try these projects send me the link!  I love to read those comments ya know!

Take Care,
Dee


BTW, I participated in a couple of linky parties....

Link to party

Click here for link to party

Click here for link to party

Saturday, June 26, 2010

Life Played Out....

This play is called LIFE......

It's jam packed, full of fun, a little crazy, hectic, pretty, a little last minute, rewarding,
sometimes exhausting (did I mention fun?) but
the show always goes on!

Scene 1....Prom 101

My oldest was asked to her first prom.  Not her prom but a junior friend, a nice young man.  Boy was I out of the loop on how much work (and $$) a prom requires.....
shopping for the dress, hair, makeup, shoes, jewelry. Oh My! 

 The best part of her first prom experience was that his friends asked her friends and well you get the picture....there was alot of cute teen girlie giddiness.

Scene 2....A Sweet Partay

A few days after prom my daughter celebrated her 16th Birthday and we threw her a surprise Sweet 16.
Most of the decorations were handmade to stick to my budget.  I have a wonderful SIL who helped
me crafting with me till all hours. 
If it could be made, it was.
My mom also did a great deal for this party....
shopping, cooking, clean up.
I could not have done a party like this without their help, that's for sure.
So...lottsa XOXO's to both of them!
We went with a SWEET 16 theme with a "Sweet's Bar" with lots of candy.  We had a really nice turnout,  the DJ was good, the kids all danced....even the boys (if the robot counts) lol!  

Sweet 16 Candle Centerpiece.....
Table Center pieces, dollar store hurricane globes, scrapbooking embelishments, pink sand, a candle and there you have an inexpensive centerpiece. 
They gave the room a nice glow, looked so pretty all lit.


 We cut labels for candy jars and glued to strips of scrapbooking paper to embelish the SWEET BAR jars......  We made taffy kabobs....the guys had to do that for us though...it was tough getting them on the skewers.  If you want to test your man's strength....ask him to skewer taffy.....it's hard....and hysterical, (especially at 1 am and you're all craft batty) lol.
The "Sweets Bar" 

 Family, good friends and fun....

We painted an ornate frame pink for the picture booth....
the kids had alot of fun taking photos here.
My girls...acting goofy as usual when the camera is out.


Scene 3.....The Little Grad 

My son's first graduation.....from preschool.
My sweet baby earned his first diploma, it was so stinkin' cute.
He was not happy to be up in front of an autitorium full of people to receive it,
making the funniest faces the whole time, he did his best though.


Coincidentally he received an award for "Best Facial Expressions" He is so funny!
 

Scene 4...The Big Grad

My middle daughter's First Graduation.... from elementary school.


She looked so pretty all dressed up in a cute little sundress, it's not too often I get to see that anymore!
A really nice Graduation ceremony, she made it safely off the stage without tripping once (big fear she had) and we celebrated at the icecream parlor afterwards.

Add in the encore of class trips, award ceremonies, sporting tournaments, Field days and class parties....and the month rolled right on by!  The ending to this play was sweet to say the least.  I did enjoy it but please, by all means, let me know your reviews lol.

I have been workin on a few more new posts and was a thinkin that once the old blog here hits 500 followers then I'll be hosting a giveaway in celebration.  I'm on Facebook, so be sure to send a request! 
Just search for Farmhouse Dee...

I'm off now to work on some more signs for my etsy shop....toodles.

Take care,
Dee

Past Posts

Related Posts with Thumbnails