
Okay...I have to ask, is there anything more American than Folk Art? Well of course there's apple pie...baseball and more but in regards to country design...well you get it, right?

I have been oooohhhing and ahhhhing flag finial displays for a while now. I almost bought one a few years back on a visit to Williamsburg but came to my senses when I reached for the price tag. I saw another on one of our trips to Gettysburg again and was once more disappointed at the high cost of owning such a piece. This time, each year, I would love to decorate with one but the prices are simply out of my budget.
Well, I finally decided enough was enough and this was finally the year that I was going to get me one. So I impulsively hopped into the car and drove the 3+ hours to P.A., ran into the store I last saw it and to my pleasure picked up the very last one on the display counter. Well I quickly shelled out the $150 to the nice man behind the counter before someone else could yank it right out of my hands, right?
Ummm no....no I didn't! I'm a terrible liar BTW. Well, rather than do all that I decided I was just going to have to make it. I grabbed my idea notebook, scribbled down a sketch of what I wanted and off I went to the stores to see what supplies I could gather. I'm happy with the way it turned out and decided that I would share with my blogger friends in case anyone else felt a little last-minute ambition too.
Here's a picture tutorial for those of you brave enough to tackle it, it is worth the effort. It really was easy...does it look exactly like the $150 one? No...but it's close enough and I like my less expensive, modified version even better. Why you ask? Well, because I made it....using good old fashioned American tenacity and ingenuity.
Necessity is the mother of invention afterall....right?
Folkart Flag Display
Materials needed....
Most of it was found in the unfinished wood section at Michaels Craft store....

-6" block of wood.....$3.99
-3" block of wood......$2.99
-small 2" round MDF plaque.....$1.99
-6" square plaque.....$1.69
-round wood finial (p/u at home improvment store)..... $2.99
-White spray paint.....$1.29
-3- (12"x8") medium sized flags.......$3.75
-6- (6"x4") small flags.............$2.40
Optional decorations...Ribbon $2 roll, and plinth block picked up from home improvement store...$2.00, I chose one with a star
Tools needed.....hammer, drill, drill bits in varying sizes depending upon size of flag poles purchased.
~The Stacking and Glueing Part~

~The drilling part...remember your safety goggles!~

~(still drilling)~

4 holes ontop of block...4 more holes in center of each side...

If you are going to embellish it with a plinth block I recommend painting first and then glueing. Spray paint the whole display....add decorative ribbon and flags.....

So, let's recap that is a total of apx. $20-$25, varies depending upon what you have readily available....Beats $100+(+) right? mmmmhmmmm.... What do you think? Will you give it a try?
Stay tuned to see how this purty display graces our
**Farmhouse Table for JULY 4th**
Now, how's about a Folk Art Flag to go along with that?

Material List....
So were you able to follow that one? Here's another folk art project that I have sold several of in the past. The shipping is pretty expensive on these because of their size so I don't sell them in the online Mercantile but I'm going to share how you can make one of your very own instead.

Material List....
-(5) 32" long pieces of unfinished pine tongue & groove beadboard found here at Homedepot.
-(2) 16-18" pices of 1" wide x 1/2" thick pieces of pine for the back
-clear construction adhesive I use liquid nails
-1 iron star, I have purchased these at local country shops but you can substitute with wood/paint.
-white school glue
-teeny tiny finishing nails...from hardware store
-eye hooks or another form of hanger
-sandpaper
Tools needed: Hammer, hair dryer


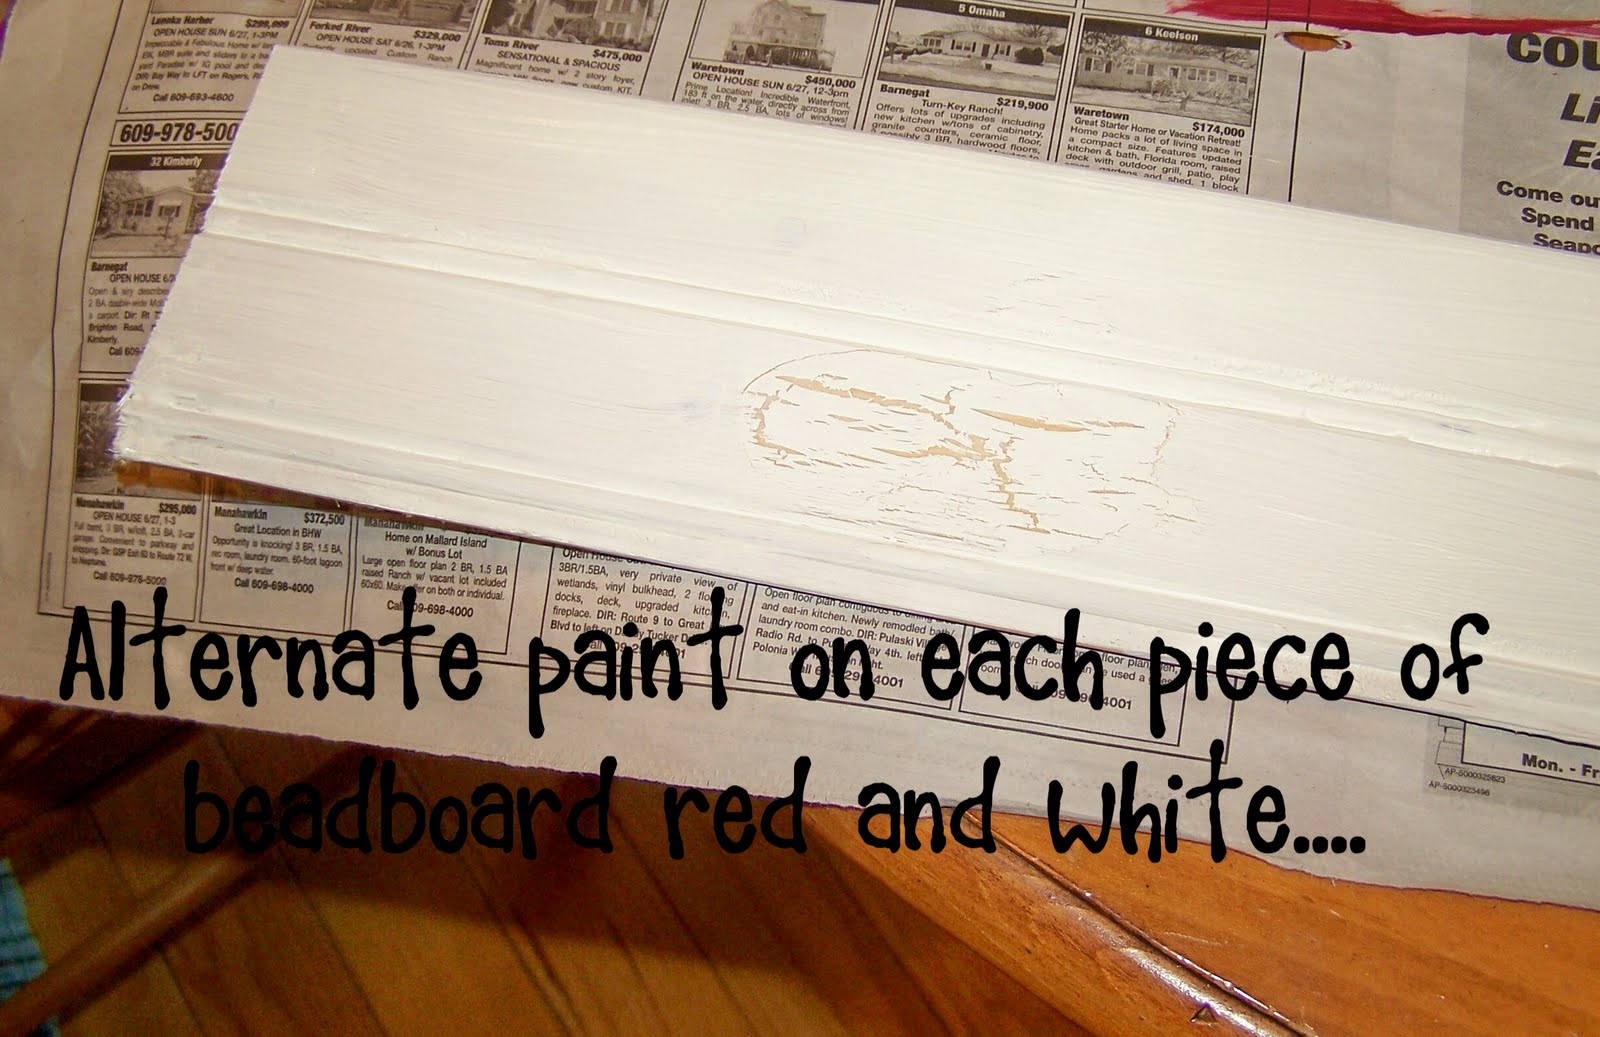
I paint the colors on pretty heavily so that it doesn't require multiple coats but if you have to paint multiple coats repeat glue process with each coat. Let them dry throughly

Make sure your edges are even and match up...
Flip over to front side and.....

Make sure you are nailing in straight verticle line, into the back supports....I nail into each board.


Peel tape off slowly when finished drying.

It took adhesive about an hour to dry thoroughly with the iron star. If you use wood it won't take as long & paint is even quicker, but I like the look of the iron star....adds texture.

Add hangers to the top of the back supports and voila...you're finished. I propped it up on my mantle in front of a large barn star to show you but it will be going outside on my porch tomorrow. You can distress it with sandpaper as I did with mine if you like. Take it a step further and antique it by wiping on a medium-dark colored stain and wiping off immediately. The stain will settle into the cracks and make it appear older and worn. I haven't done that with this one but still might, I kind of liked the cleaner look this time. Seal with an appropriate sealer if using out doors.....Enjoy.....
I'm off to finish decorating will show you more hopefully on Friday!
Let me know what you think of course and if you try these projects send me the link! I love to read those comments ya know!
Take Care,
Dee


I love reading your blog and seeing all the creative things you make!
ReplyDeleteHappy Fourth of July to our American neighbor's!
I love them both and I think you're very resourceful and creative!
ReplyDeleteLove what you made. $150 really? So glad you didn't spend that kind of money when yours looks fantastic.
ReplyDeleteHave a spectacular Fourth!
Thank you for sharing what you did..and the original is soooo not worth the 150 bucks...redonkulous in my opinion..love the flag too..have a wonderful 4th;)
ReplyDeleteGreat job, Dee I can't wait to see more of your 4th of July pics! I would love to make that flag for sure. I like Aunt Ruthie's from the pottery barn that she has on her mantle but can't see shelling out more than 100 for it. This is a great alternative.
ReplyDeleteCarey
Hey gals thanks for taking the time to comment! I wanted to add that the two flag displays I saw were both in tourist trap shops. They were larger and really nice with lots of details, Colonial Williamsburg is quite expensive all around though. Thanks for all the nice comments about the projects! I will be having another giveaway very soon and those of you who leave comments at FHCS already have an entry.....or two. You're all too sweet. Happy day!
ReplyDeleteHugs, Dee
SWEET! You did an wonderful job! Very, very nice!
ReplyDeleteHope your summer is going well. We are sooooooo busy!
Blessings sweet friend! Linda
Both of your projects look so cute, I love the flag holder!!
ReplyDeleteBoth look fantastic Dee.. great job. Happy 4th!
ReplyDeleteBeautiful crafts Dee that will stand the test of time and trends. Thank you for sharing the details. Looking for your future posts on all your great decor. Happy fourth to you. ~Take care~ Emelia
ReplyDeletegreat ideas, thanks for sharing!
ReplyDeleteI love the flag made out of bead board! Thanks for the inspiration sister!
ReplyDeleteMany Blessings,
M.
Hi Dee, I forgot to mention how much I like the white embossed platter hanging on the wall above the flag .The white against the red wall is nice and striking. Do you remember where you purchased it? Thanks for such a great blog and nice place to "visit"! Emelia
ReplyDeleteHey, we have a looove for finials in common, I made mine 20 years or so ago and it's gone through a few coats of paint, but always remains a wonderful way to hold our flags...Yours is beautiful and I was so happy to see it! Thanks for sharing! Debbie @ Cottage Hann~Me~Downs
ReplyDeleteDee, you are quite the crafty one! I'm so impressed! Both of these are terrific projects.
ReplyDeleteLike you, I'll leave the Americana out all summer. It makes me smile! ~
~ HAPPY 4TH OF JULY1 ~
Love it! You are one crafty lady~I so would be that person to drive 3+hrs and buy that finial.lol:) Anyway,your home looks very inviting. I also,leave my Americana out all summer makes me happy. Have a Happy 4th of July~Nicole
ReplyDeleteBoth are wonderful ideas - thank you!
ReplyDeleteTwo perfect projects.. thank you!! Have a Blessed Fourth!! -Tammy
ReplyDeleteI just love your projects and have an old porch bannister post (already white) at home that I've been meaning to make into one of these, only mine will be free-standing...so we have to make the base for it ourselves so the post will stand on its own. It came with our house and I would like to replicate it someday and make bannisters for our porch steps....projects EVERYwhere!
ReplyDeleteI love your flag, too and you are ingenious when it comes to this sort of project!
I hope your strawberry cream puff turns out beautifully and that you have a GREAT fourth of July party and celebration!
XOXO
Joni
Dee: I forgot to tell you this: I have the same platter and I use it on a daily basis in my farmhouse kitchen. I'm thinking I may have to retire it and hang it on a red wall sometime....it looks STUNNING! LOVE IT!
ReplyDeleteXOXO
Joni
I love the wooden flag! Actually both projects are very nice. Thanks for showing how.
ReplyDeleteThis is so great! I had just seen another vintage flag-holder on another blog, now I want one too! Your projects are great, I'll be following to keep up with all the goodies!
ReplyDeleteHAPPY 4th!
~♥~
Kristal
That turned out so cute! I like the iron star, too.
ReplyDelete