Monday, July 12, 2010

Crab Boil 2010


It's Crab Boiling time again...

Ahhh, I should have known that when I was taking these photos
they would come back to haunt me. 
Tease me.....yes, taunt me.

Mouth watering.

WARNING:  If you are a Seafood lover...you may not want to look at these photos,
they are just plain naughty.

Alright...I'm not going to show you all these photos without sharing the recipe so you can have a Crab boil of your very own...that would be just plain cruel. lol.  So here goes:

Low Country Crab Boil
Shuck 6-8 ears of corn & break in half
1 lb. of petite red "taters"
1 lb. of sausage-sliced into 1" pcs.

1 lb. Fresh Mussels
1 lb. of fresh little neck or mahogany clams

1 lb. of king crab legs
1 lb. blue claw crabs
1 lb. shrimp
**Fill a large pot (I use my canner with metal inserts removed) 1/2 way with water, add 2 cups chicken stock , 2 T Zataran's Liquid Crab Boil, 2 bay leaves, 1/4 c fresh parsely chopped. 2 T old Bay Seasoning
**Boil sausage, taters and corn for apx. 20 minutes or until taters are soft.
**Remove taters and corn with slotted spoon or tongs reserving broth in pot.

Yeah, go ahead girl, slap some butter on those cobs n taters!  You know you wanted to.  Put aside in a seperate covered dish to keep warm.

**Into the simmering broth layer (in order) Clams, then lobster claws and cook for 3 minutes. 
**Next layer king crab legs, blue claw crabs, then mussels and cook for 3 more minutes. 
(Leave everything in the pot...and proceed to next step)

Is your mouth watering yet....don't worry we're almost finished!
**Lastly, add the shrimp on top.  Cover and boil for apx. 3-5 minutes or until shrimp is PINK.
Remove everything with tongs.
***reserve the stock ***
***I make a red Clam Chowder, using the broth, left over taters and corn....
everything marinates in the broth and it is the best chowder evah!***
(You can also freeze it for future use.)

 **Serve with melted butter, garlic butter, and
Homemade cocktail sauce made from 1 c ketchup, and 1/4 c. grated horseradish.

NOW....
Grab Your Claw Crackers and go to TOWN.....do not expect this to be a neatly eaten meal...
that's just not going to happen!
Fresh homemade coleslaw to go with it.
Make sure your table is layered with a plastic table cloth then covered in newspaper, plastic plates and cups for easy cleanup! I put out wood crab crackers and lobster picks with a whole roll of papertowels...this meal is to be enjoyed, no fancy eatin' here, you will be a mess when through!

Now if you compare the cost of making this meal to the cost of going out to a good seafood restaraunt and feeding 8-10 people this wins hands down.  We live along the Jersey shore so Fresh Seafood is readily available and sold at a reasonable cost to us.  We spend alot of summer days catching our own crabs and clamming so if you can do the same you can eat your own catch as part of the meal too.

My family looks forward to this each summer.  Lots of great memories have been made around our Crab boil table and I can't wait for the next one.

Take care,
Dee

Friday, July 9, 2010

Down a Country Road


I take the back roads whenever possible. 
I try to avoid the busiest roads, even if it takes longer to get there. 
I will find my way around it.

Oh no...we don't own a GPS...I don't want one,
I actually like the adventure of getting lost on the backroads.
Tis true....

I open the windows and let the breeze blow my hair in every direction.  Down the road we go, singing all the way as loud as we can over the sound of the wind rushing in. 


Sometimes we just hop into the car, get on the road, and see where it takes us.  No destination in mind.  One back road after another, passing fields and farms we have ventured upon some interesting places we would have never found otherwise.

How's about you....do you take the back roads
whenever you can?
Perhaps you live in a place where
all roads are back roads?

Well we are off for another country drive....have a great weekend folks!

Take Care,
Dee

Monday, July 5, 2010

Happy Fourth!

 I hope you had a great Fourth of July!  Celebrate the birth of our nation and rejoice in the liberties and freedom we have here in America.  
I can't think of a better reason for a summer barbeque each year than that. 


Each year our small town hosts a patriotic parade and firework display over the lake at dusk.  We host a family barbeque and swim before heading out the door with picnic blanket in hand to find the perfect spot.    

 I like to doll up the farmhouse with some patriotic decor in time for the party but
it will all be left up until labor day to enjoy throughout the summer.  Here's a few photo's of patriotisim around our home and barbeque.


Mantel decor.... 


These lanterns were made from glass jars, I tied a gingham ribbon onto the hanger, a white candle inside lights up the night when the festivities continue into the evening.
Several are hung all the way down the trellis that covers our back deck.  When they're all lit they give off a dim glow, just enough light to see but not enough to attract bugs.


 The tables were all set with patriotic accents for the party. 
A vintage cake holder is put to use safeguarding the sweets.


A big bowl of watermelon quenches our thirst in the summer heat. 
What barbeque would be complete without some juicy watermelon? 

A fresh baked Strawberry pie....

An old crate makes transporting out the barbeque necessities easy.  My kiddos have hotdogs and burgers with their ketchup...so we go through alot  of it each summer.  I made a mason jar dispenser to hold large amounts.  I looks nicer and cleans up easier too.


The drink station is set up outside to avoid cleaning up any spills
when those little hands refill their cups.


My lil guy was also as festive as can be in his flag bathing suit....
picking me some daisies no less. 


So what did you do for July fourth this year?  Do you have any traditions, recipes you would like to share? 

Take care,
Dee

Wednesday, June 30, 2010

Americana Folk Art for Real Folks

A lil' Americana Folk Art for Real Folks...

Okay...I have to ask, is there anything more American than Folk Art?  Well of course there's apple pie...baseball and more but in regards to country design...well you get it, right?

I'm still working on decorating for the fourth, I still have lots to get ready for our annual Fourth of July party and will be busy for the next couple of days.  The Americana pretty much stays up here all summer long so it's worth the effort to go all out.  I love the festive colors and they go nicely with our Farmhouse decor.  

I have been oooohhhing and ahhhhing flag finial displays for a while now.  I almost bought one a few years back on a visit to Williamsburg but came to my senses when I reached for the price tag.  I saw another on one of our trips to Gettysburg again and was once more disappointed at the high cost of owning such a piece.  This time, each year, I would love to decorate with one but the prices are simply out of my budget.

Well, I finally decided enough was enough and this was finally the year that I was going to get me one.  So I impulsively hopped into the car and drove the 3+ hours to P.A., ran into the store I last saw it and to my pleasure picked up the very last one on the display counter.  Well I quickly shelled out the $150 to the nice man behind the counter before someone else could yank it right out of my hands, right?   

Ummm no....no I didn't!  I'm a terrible liar BTW.  Well, rather than do all that I decided I was just going to have to make it.  I grabbed my idea notebook, scribbled down a sketch of what I wanted and off I went to the stores to see what supplies I could gather.  I'm happy with the way it turned out and decided that I would share with my blogger friends in case anyone else felt a little last-minute ambition too. 

Here's a picture tutorial for those of you brave enough to tackle it, it is worth the effort.  It really was easy...does it look exactly like the $150 one?  No...but it's close enough and I like my less expensive, modified version even better.  Why you ask?  Well, because I made it....using good old fashioned American tenacity and ingenuity. 
Necessity is the mother of invention afterall....right?

Folkart Flag Display

Materials needed....
Most of it was found in the unfinished wood section at Michaels Craft store....

-6" block of wood.....$3.99
-3" block of wood......$2.99
-small 2" round MDF plaque.....$1.99
-6" square plaque.....$1.69
-round wood finial (p/u at home improvment store)..... $2.99
-White spray paint.....$1.29
-3- (12"x8") medium sized flags.......$3.75
-6- (6"x4") small flags.............$2.40

Optional decorations...Ribbon $2 roll, and plinth block picked up from home improvement store...$2.00, I chose one with a star
Tools needed.....hammer, drill, drill bits in varying sizes depending upon size of flag poles purchased.

~The Stacking and Glueing Part~


~The drilling part...remember your safety goggles!~


~(still drilling)~

4 holes ontop of block...4 more holes in center of each side...


If you are going to embellish it with a plinth block I recommend painting first and then glueing.  Spray paint the whole display....add decorative ribbon and flags.....


So, let's recap that is a total of apx. $20-$25, varies depending upon what you have readily available....Beats $100+(+) right?   mmmmhmmmm....  What do you think?  Will you give it a try?

Stay tuned to see how this purty display graces our
**Farmhouse Table for JULY 4th**


Now, how's about a Folk Art Flag to go along with that?

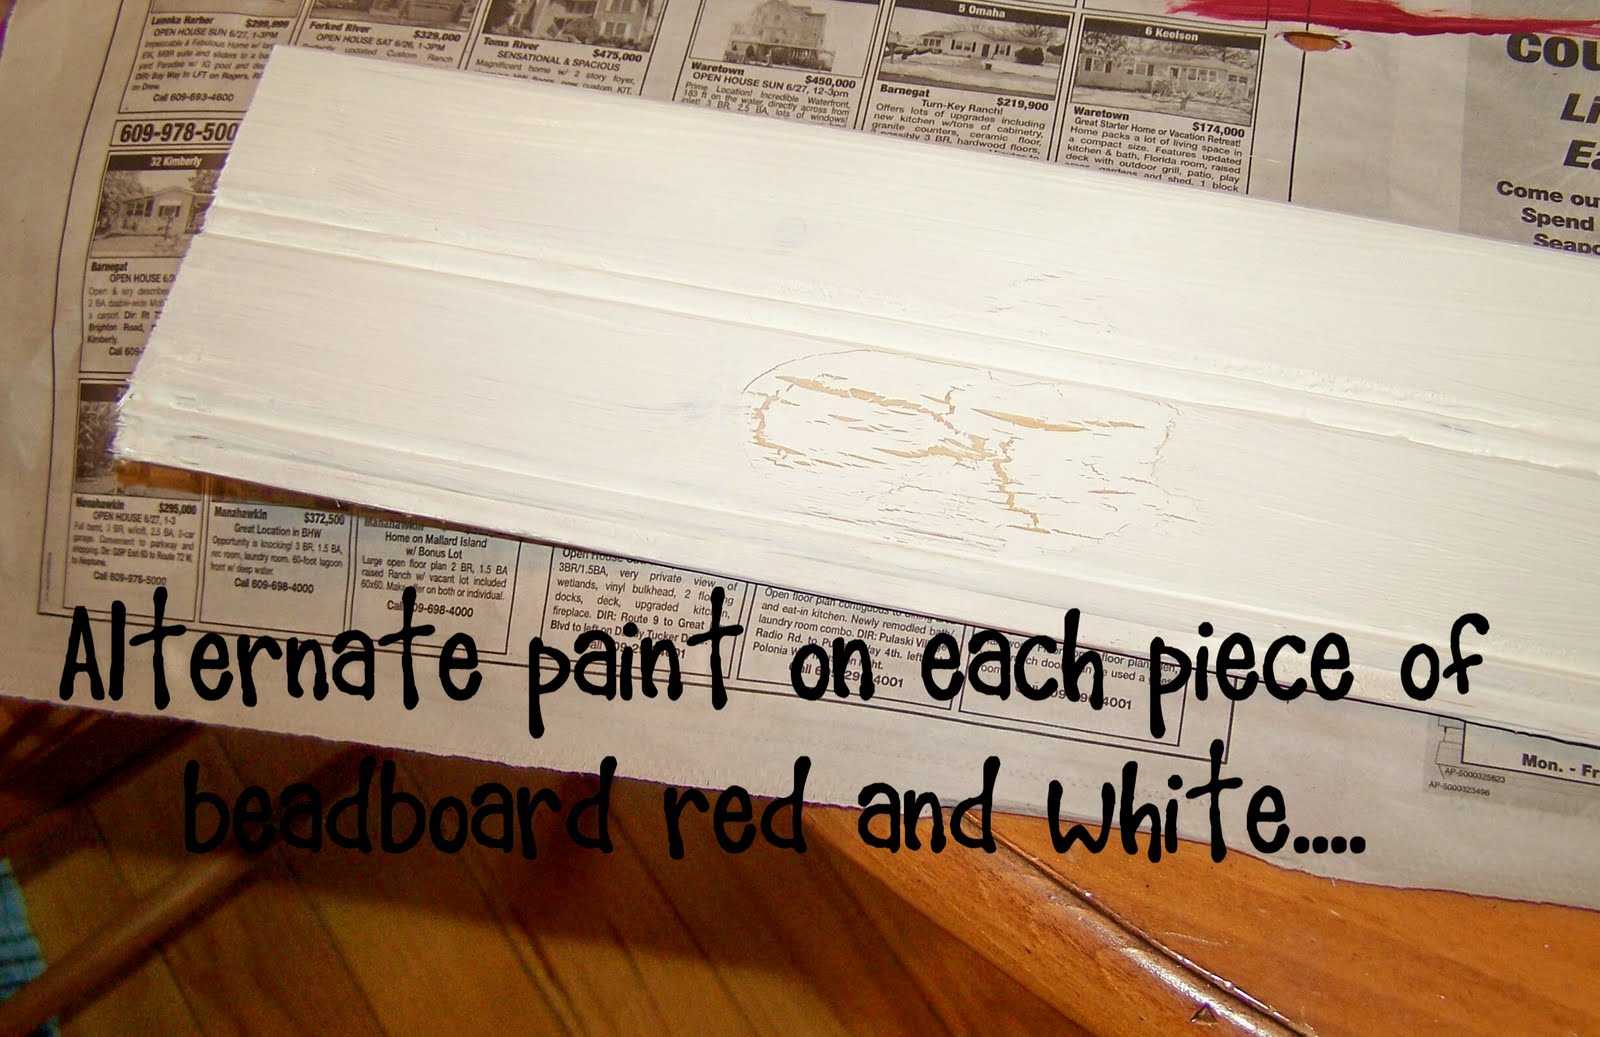
So were you able to follow that one?  Here's another folk art project that I have sold several of in the past.  The shipping is pretty expensive on these because of their size so I don't sell them in the online Mercantile but I'm going to share how you can make one of your very own instead. 


Material List....

-(5) 32" long pieces of unfinished pine tongue & groove beadboard found here at Homedepot.
-(2) 16-18" pices of 1" wide x 1/2" thick pieces of pine for the back
-clear construction adhesive I use liquid nails

-1 iron star, I have purchased these at local country shops but you can substitute with wood/paint.
-Red, White and Blue craft paint, foam brushes
-white school glue
-teeny tiny finishing nails...from hardware store
-eye hooks or another form of hanger
-sandpaper
Tools needed:  Hammer, hair dryer


I paint the colors on pretty heavily so that it doesn't require multiple coats but if you have to paint multiple coats repeat glue process with each coat.  Let them dry throughly

 Make sure your edges are even and match up... 

Flip over to front side and.....


Make sure you are nailing in straight verticle line, into the back supports....I nail into each board.

 Peel tape off slowly when finished drying.


It took adhesive about an hour to dry thoroughly with the iron star.  If you use wood it won't take as long & paint is even quicker, but I like the look of the iron star....adds texture.


Add hangers to the top of the back supports and voila...you're finished.  I propped it up on my mantle in front of a large barn star to show you but it will be going outside on my porch tomorrow.  You can distress it with sandpaper as I did with mine if you like.  Take it a step further and antique it by wiping on a medium-dark colored stain and wiping off immediately.  The stain will settle into the cracks and make it appear older and worn.  I haven't done that with this one but still might, I kind of liked the cleaner look this time.  Seal with an appropriate sealer if using out doors.....Enjoy.....

I'm off to finish decorating will show you more hopefully on Friday! 

Let me know what you think of course and if you try these projects send me the link!  I love to read those comments ya know!

Take Care,
Dee


BTW, I participated in a couple of linky parties....

Link to party

Click here for link to party

Click here for link to party

Past Posts

Related Posts with Thumbnails